Do It Yourself ✨✨
Saturday, 14 October 2017
Monday, 9 October 2017
Saturday, 23 September 2017
Tuesday, 19 September 2017
DIY PENCIL CASE

This case is a generously sized zippered pouch measuring 7″ x 10½”. It is fully lined and boasts easy-to-sew professional French seams to finish the sides. The addition of zipper tabs give you something to hold onto while you are using the zipper.
Scared of zippers? Be afraid no more! This pencil case doesn’t need a fancy zipper foot, and I’ll explain every step of the process with detailed photos.
WHAT YOU’LL NEED:
- Outer fabric: one 12″ x 14″ rectangle
- Lining fabric: one 12″ x 14″ rectangle
- Zipper tab fabric: two 1″ x 3″ rectangles
- Medium-weight interfacing or fusible fleece: one 12″ x 14″ rectangle (optional)
- 12″ (or longer) zipper
- Water-soluble glue or pins
- Matching thread
- Iron and pressing surface
- Sewing machine and other regular sewing supplies

STEP 1: ADD THE INTERFACING OR FUSIBLE FLEECE
If you plan to use interfacing or fusible fleece, start by fusing it to the wrong side of the outer fabric, following the manufacturer’s instructions. This will give your pencil case more body and durability.

STEP 2: PREPARE THE ZIPPER
Fold the zipper tabs in half lengthwise, matching the short ends. Press well to mark the center line.

Unzip the zipper halfway. Open up the zipper tabs you just pressed and place them on top of the zipper, right sides together, next to the metal ends. Glue or pin the bottom half of the zipper tab (the half touching the metal ends) to the zipper.


With the zipper tab open, stitch along the pressed center line. Backstitch at the beginning and end of each seam to secure it. Sew slowly and carefully over the zipper teeth, using the hand wheel if necessary, to make sure your needle doesn’t break.


Finally, press the top of the zipper tab, wrong sides together with itself. Baste or use glue to hold it in place. Cut off the metal ends and any zipper tape that extends past the tabs. Be careful not to cut into the metal with your sewing scissors!


STEP 3: SEW THE POUCH PIECES TOGETHER
Match the lining and outer fabrics with right sides together. Place on your workspace with the outer fabric on top.

Place the zipper in between the outer and lining layers with the right side up. The zipper pull should be on the left. Line up the top of the zipper with the top of each fabric. Glue or pin it in place.

Move your sewing machine needle position to the left as far as it will go. Line up the fabric in your sewing machine so the needle is ¼” over from the raw edge. The presser foot should be able to slide freely beside the zipper teeth. Stitch the seam, remembering to backstitch at the beginning and end to secure the thread.

Tip: To easily sew past the zipper pull, stop just before it with your needle in the down position. Lift the presser foot and reach under the fabric to slide the zipper pull out of the way. Lower the presser foot and continue sewing.
Then, open the lining and outer fabric so they are wrong sides together. Press the fabric away from the zipper tape on both sides.

For a professional finish, topstich the edge in matching or contrasting thread.

STEP 4: MAKE THE POUCH SHAPE
Fold the lining back so it is right sides together with itself.

Fold the outer fabric up as well, aligning the edge of the lining fabric with the top edge of the outer fabric.

Open the zipper halfway and place it right side up between the outer and lining layers. Line up the top of the zipper with the top of both fabrics and glue or pin it in place. If the zipper is closed, the zipper pull will be on the right.
Line up the fabric in your sewing machine foot so the needle is ¼” over from the raw edge. Stitch the seam as before, remembering to backstitch at the beginning and end to secure the thread.

Turn the pencil case right-side out. The outer fabric should be on the outside and lining on the inside of the tube shape.

Press the lining and outer fabric away from the zipper tape. It helps to turn the pencil case inside out to properly press the lining.
Top stitch this edge if desired. Open the zipper all the way and arrange the opening around the needle before stitching. (See photo below)

Fold the tube so the zipper edge is 1″ down from the top. Press well to hold the shape in place.

STEP 5: FINISH WITH A FRENCH SEAM
Almost done! Now we can finish the pencil case with a French seam. Pin the sides and stitch each one with a ¼” seam. Be careful when stitching over the zipper teeth.

Trim each side seam allowance to a generous 1/8″.

Turn the pencil case inside out. Push out the corners and seam evenly. Press well.

Stitch each end again with a generous ¼” seam, enclosing the previous seam and creating a clean edge.

Turn the pencil case right-side out again and give it a good press. Trim any threads as necessary and remove basting stitches, if used.

DIY INVERTED BOOKSHELF


The inverted bookshelf turns a bit of your living room upside down as it hangs all of the books from the bottom instead of supporting them from below. It's a satisfying optical trick and doesn't damage any of the books. In fact, you can take books in and out of it whenever you want.
Step 1: Materials

In addition to the basic materials for a shelf of wood and brackets, you will also need elastic webbing and a staple gun. The elastic that I'm using here can stretch beyond 200% of its original size and is certainly strong enough to hold the books here.
optional: glue gun
optional: glue gun
Step 2: Measure It Out


The key things you need to figure out are how wide your books are and what length of elastic is good enough to support all of the books against the board without crushing them against it.
Measuring out my books, the average width was one inch and the ideal length of elastic turned out to be 14 inches.
Measuring out my books, the average width was one inch and the ideal length of elastic turned out to be 14 inches.
Step 3: Staple the Elastic to the Board

Now that you have a length and a width, the next step is to staple gun two pieces of elastic down the middle of the board. I'm going to be suspending 12 books here, so I used just over 14 feet of material for each side.
Start each piece of elastic with the excess facing in. Staple this in place and fold the elastic back over to start running it down the board. Measure out 14 inches, staple it one inch farther and repeat until you get to the other end and fold the excess back inside again before stapling it.
Start each piece of elastic with the excess facing in. Staple this in place and fold the elastic back over to start running it down the board. Measure out 14 inches, staple it one inch farther and repeat until you get to the other end and fold the excess back inside again before stapling it.
Step 4: Insert Books to Test

I slid the books in and even the heaviest book was perfectly snug. It turned out that two straps was too much for the smaller books and started to compress them, so I only used the front strap and squished the other strap behind it.
Step 5: Add Brackets and Attach to Wall

Now that you know that the shelf itself is stable, add a couple of brackets to the other side of the board. Then simply screw it into the wall.
Note: This was intended for a short term installation. To make it more permanent, I'd recommend hiding a couple L brackets on the underside.
Note: This was intended for a short term installation. To make it more permanent, I'd recommend hiding a couple L brackets on the underside.
Step 6: Sit Back and Enjoy


You can leave it as is or go for some more realism by gluing some toys, bookends, or even a fake drink to the bottom of the board to complete the look!
diy FABRIC BOOKMARK TUTORIAL


Supplies:
- Fabric cut to 4" x 8"
- Fusible interfacing cut to 3.75" x 7.75"
- Fabric strip for flower cut to about 1.25" x 42"
- Coordinating thread and sewing machine
- Fabric glue
- Coordinating button
- Needle and thread
Steps :
1. Following manufacturer's instructions, iron fusible interfacing to wrong side of fabric piece.
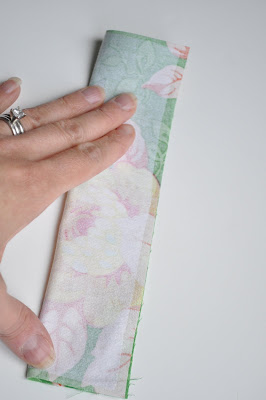
2. Fold fabric piece in half width-wise, right sides together.
3. Sew across bottom edge and up side edge.


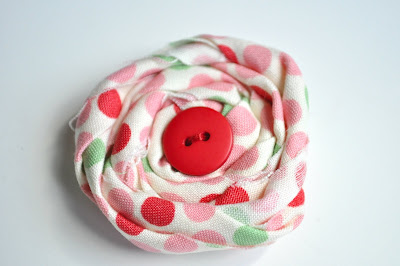
7. Create a fabric rosette with your long strip of coordinating fabric and fabric glue. Hand sew a button in the middle.
Subscribe to:
Comments (Atom)


